2 Importing data
In this chapter, we will explain how to prepare the input file containing genotypic data, and how to upload it into STRAF.
2.1 STR data and STRAF input format
STR data consists in various observations: the genotypes (number of STR repeats) of each individual, at each locus.
In genetics, we potentially observe two values per individual and per locus, if the markers are diploid, that is two copies are present per sample.
STRAF’s input file is a text file containing the genotypes of each sample:
The first column, named ind, needs to contain the sample ID
The second column, named pop, contains the population ID (this column must exist even if a single population is studied)
The next columns correspond to genotypes: for haploid samples, one column per locus must be reported; for diploid data, two columns per locus (with the same name)
Genotypes must be encoded as numbers (STRAF accepts point alleles, e.g. 9.3 in TH01)
Missing data (e.g. null alleles) must be indicated with a “0”.
For diploid data, the table should look like this:
| ind | pop | Locus1 | Locus1 | Locus2 | Locus2 |
|---|---|---|---|---|---|
| A | Bern | 12 | 14 | 17 | 17 |
| B | Bern | 14 | 14 | 13 | 15.2 |
| C | Lausanne | 12 | 16 | 15.2 | 17 |
For haploid data, the table would look like this:
| ind | pop | Locus1 | Locus2 |
|---|---|---|---|
| A | Bern | 12 | 17 |
| B | Bern | 14 | 13 |
| C | Lausanne | 12 | 15.2 |
2.2 Generating the input data from Excel
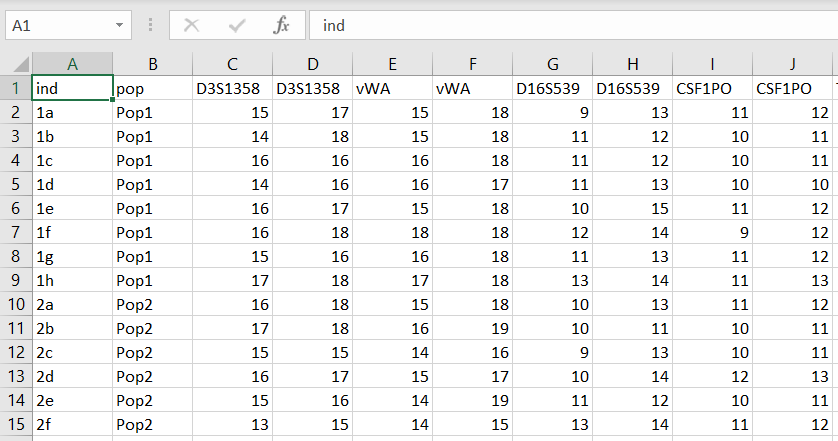
It only takes a few steps to generate an input file in a format that is suitable for use in STRAF. From Excel, for example, we can start from a spreadsheet looking like this:
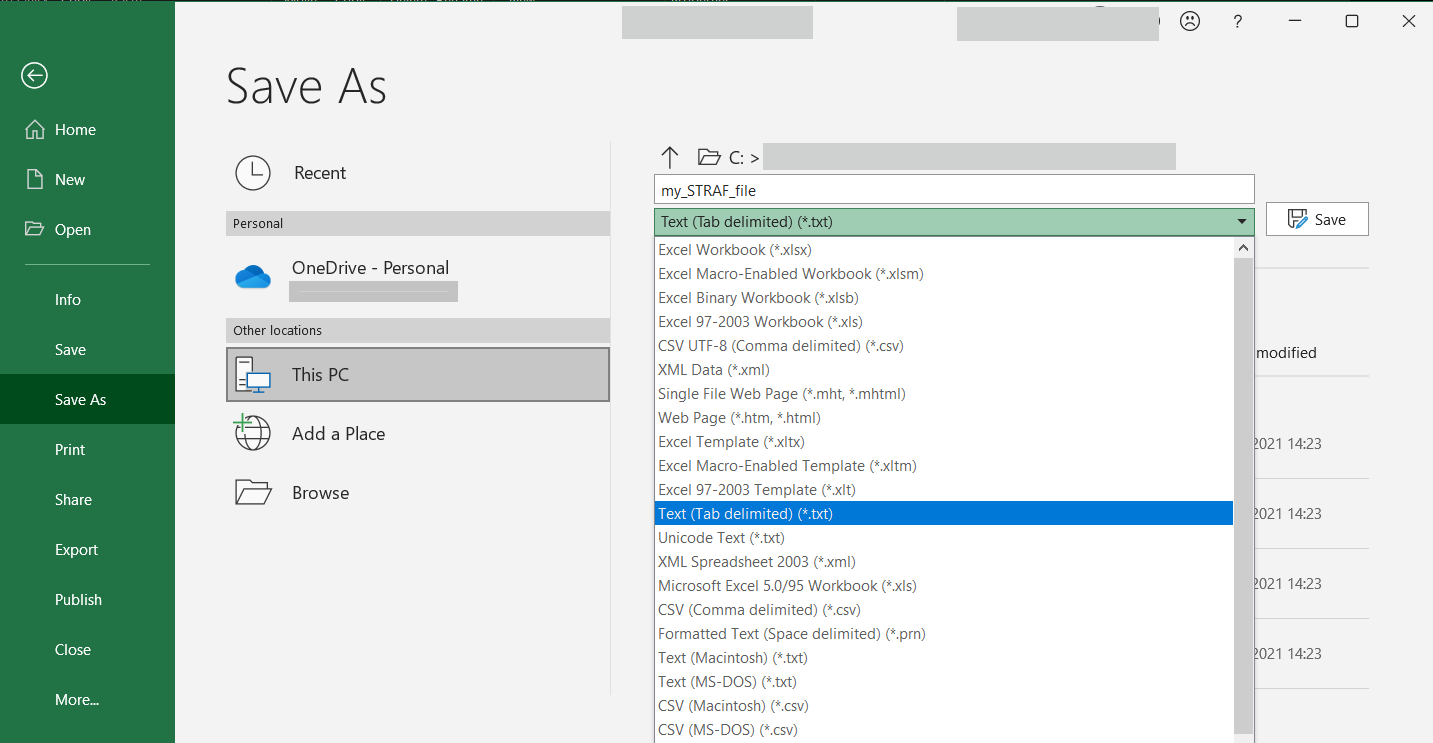
Then, one simply needs to save this table as a tab-delimited text file. This can be
achieved by clicking on Save As > Text (Tab-delimited) (*.txt)
2.3 Uploading the data to STRAF
Once the input file has been prepared, it is possible to upload it into STRAF. Alternatively, you can download an example file by clicking on the link in the sidebar.
Then, you need to select the ploidy of your data (for example, Diploid for autosomal markers, and Haploid for Y-chromosome markers). After that, you can upload the file by clicking on Browse and selecting the file on your computer.
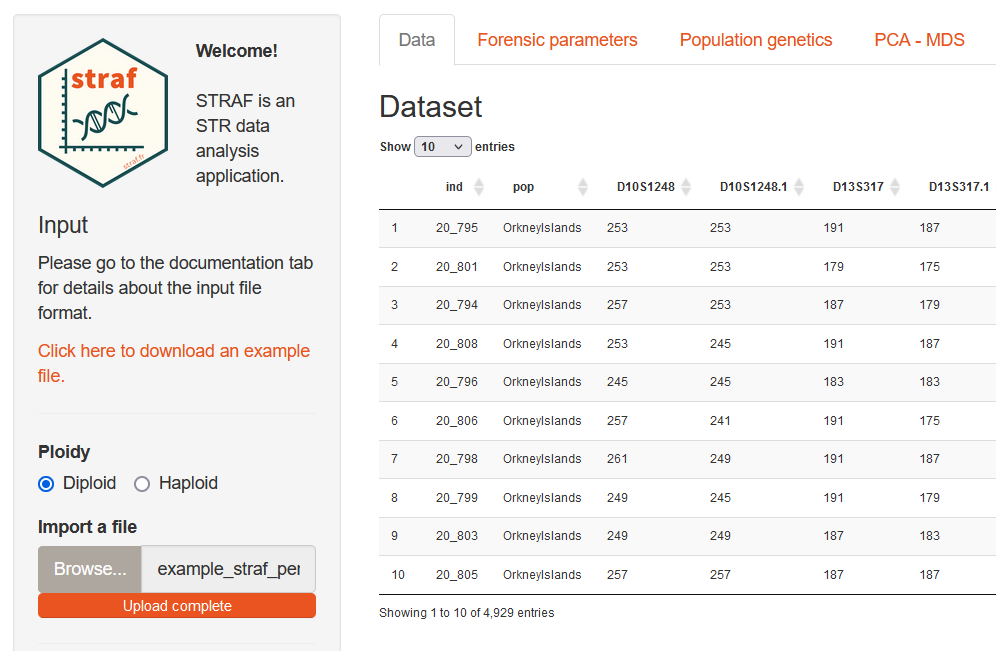
Once the file is uploaded, a preview will be displayed on the right and all the analyses will be available. If not, it is likely that an error has occurred. If the error message is not explicit, you can refer to the Input file checklist below that gathers common issues with the input file.
2.4 Common issues
Even though you’ve been very careful in the generation of STRAF’s input file, it is possible that you still run into an error after uploading the file to STRAF. In case STRAF cannot read your input file, we’ve put together a checklist to identify common issues with the input file.
Input file checklist
- Check input parameters in the sidebar: do they actually correspond to the input data?
- Check locus names: are they all different for haploid data? Do both columns for a single locus for diploid data have the exact same name?
- Check that all missing data have been encoded with a “0”
- Try to remove any special characters from sample and locus names
- Check for the presence of empty spaces at the end of each line
- Check if alleles are exclusively encoded with numbers
- Check if values are separated by tabs and not spaces
- Check if the first two columns are names “ind” and “pop”
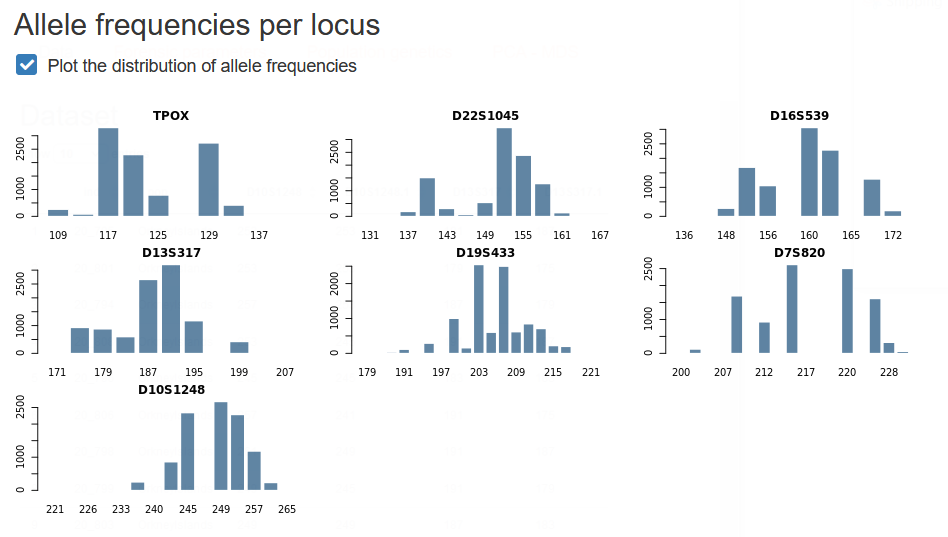
2.5 Having a first look at the data
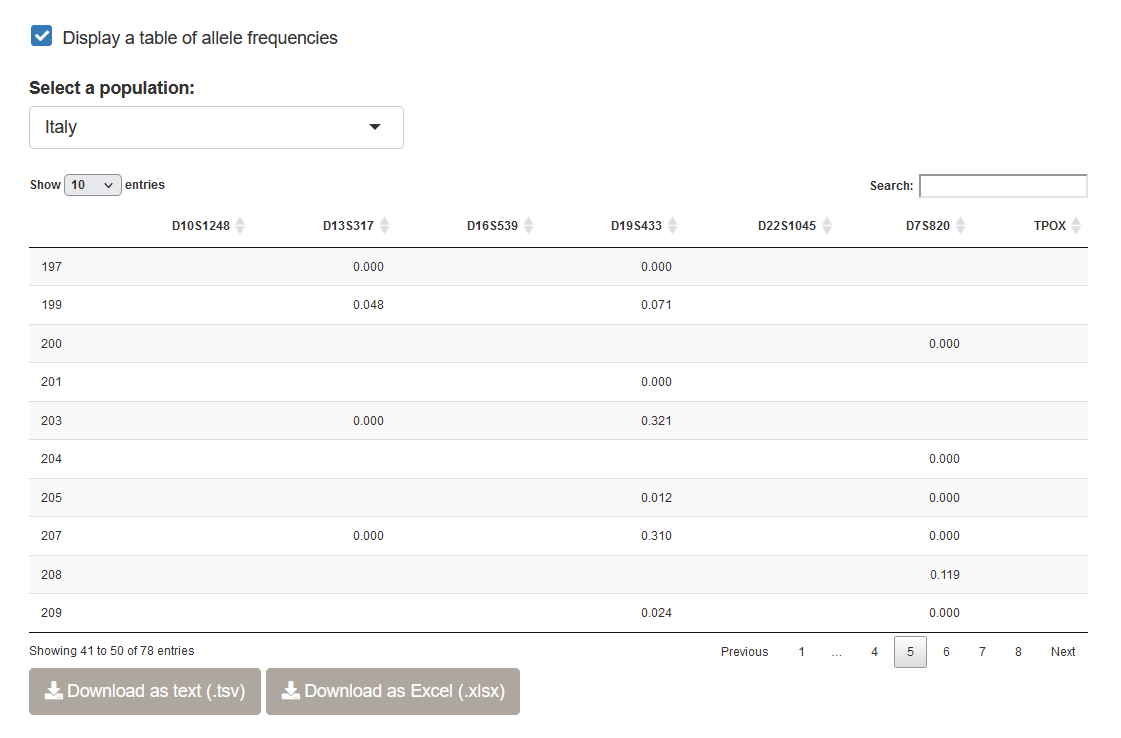
Below the dataset preview, you will be able to generate a plot of allele frequencies at each locus.
You can also generate an allele frequency table, which is standard practice when reporting new population data in a forensics journal. You can either download the allele frequencies in a text format (TSV), or as an Excel (XLSX) file. Note that you have the ability to select a specific population using the drop-down menu above the table.